 How-to
7 Steps to Design a Reliable Off-Grid Power System
Last Updated: November 15, 2026
Quick Summary
To design a reliable off-grid power system, list every appliance and its daily watt-hours first, then size the solar array and battery bank from that load assessment. Divide daily watt-hours by peak sun hours, add a cushion of roughly 1.3 to 1.5 times, and plan 2-3 days of battery autonomy for a full-time home.
- List each device's watts and daily hours before buying any hardware.
- Size the array at roughly 1.3 to 1.5 times the raw math.
- Plan 2-3 days of autonomy for a full-time residence in mixed weather.
- Keep DC voltage drop under about 3% and AC runs under about 3-5%.
- Put a fuse or DC breaker on the battery positive, close to the terminal.
Table of Contents
- Step 1: List Every Load Before You Buy Anything
- Step 2: Answer How Much Solar Do I Need to Be Completely Off-Grid
- Step 3: Skip the Guesswork With an Off-Grid Solar System Sizing Calculator
- Step 4: Sizing an Off-Grid Solar System for a 1000 Sq Ft House
- Step 5: Match Panels, Charge Controllers, and Inverters to Your Battery Bank
- Step 6: Wiring, Overcurrent Protection, and Code Compliance
- Step 7: Compare the Best Off-Grid Solar System Packages With Batteries
- Plan Your Build With a Victron Specialist Before You Order
- Frequently Asked Questions
Step 1: List Every Load Before You Buy Anything
Most beginners buy panels first. That is the wrong order, and it is why so many first systems end up undersized. Before you spend a dollar on hardware, list every appliance you plan to run. This load assessment is the foundation of any reliable off-grid power system.
The appliance list decides everything else. Panels, batteries, inverters, and wire all follow from it.
Build Your Appliance Worksheet
Write down each device, its watts, and how many hours per day it runs. Multiply watts by hours to get watt-hours.
| Appliance | Watts | Hours/Day | Watt-Hours/Day |
|---|---|---|---|
| LED lights (4) | 40 | 5 | 200 |
| Laptop | 65 | 6 | 390 |
| Mini fridge | 60 | 8 (duty cycle) | 480 |
| Phone chargers | 20 | 3 | 60 |
| Fan | 50 | 4 | 200 |
Watt-Hours/Day
Add the column: 1,330 watt-hours per day. Note which items have a surge, like a fridge compressor kicking on. Surge power matters more than running watts when you size the inverter.
Step 2: Answer How Much Solar Do I Need to Be Completely Off-Grid
The honest answer: more than you think. How much solar you need depends on your daily watt-hours and your local sun hours, not on a rule of thumb.
Divide daily watt-hours by peak sun hours. Then add a cushion for cloudy days and panel losses. A common approach is to size the array at roughly 1.3 to 1.5 times the raw math.
For the 1,330 watt-hour example above and about 4 sun hours, the raw figure is around 333 watts. With the cushion, plan for 450 to 500 watts of panels. In practice, that means two 250-watt panels.
Step 3: Skip the Guesswork With an Off-Grid Solar System Sizing Calculator
An off-grid solar system sizing calculator turns your worksheet into component targets in minutes. It handles the math most people get wrong: depth of discharge, inverter losses, and days of autonomy.
Here is how to use one well:
- Enter daily watt-hours from Step 1
- Set days of autonomy (2-3 for most homes)
- Pick battery chemistry and depth of discharge
Treat the calculator as a starting point, not gospel. Check its assumptions against your own worst-case weather. A sizing tool that assumes full sun every day will leave you short in winter.
Step 4: Sizing an Off-Grid Solar System for a 1000 Sq Ft House
A 1000 sq ft house usually needs a bigger system than a cabin or van. Typical daily use runs higher because of refrigeration, water pumping, and more lighting.
Plan around these load groups:
- Base loads: fridge, modem, lights, phone charging
- Comfort loads: fans, small AC, TV
- Surge loads: well pump, microwave, power tools
That points to roughly 1,000 to 1,500 watts of panels and a battery bank with 2 days of autonomy. If you are sizing a smaller dwelling, our guide on how to size solar for a cabin walks through the same math step by step.
Step 5: Match Panels, Charge Controllers, and Inverters to Your Battery Bank
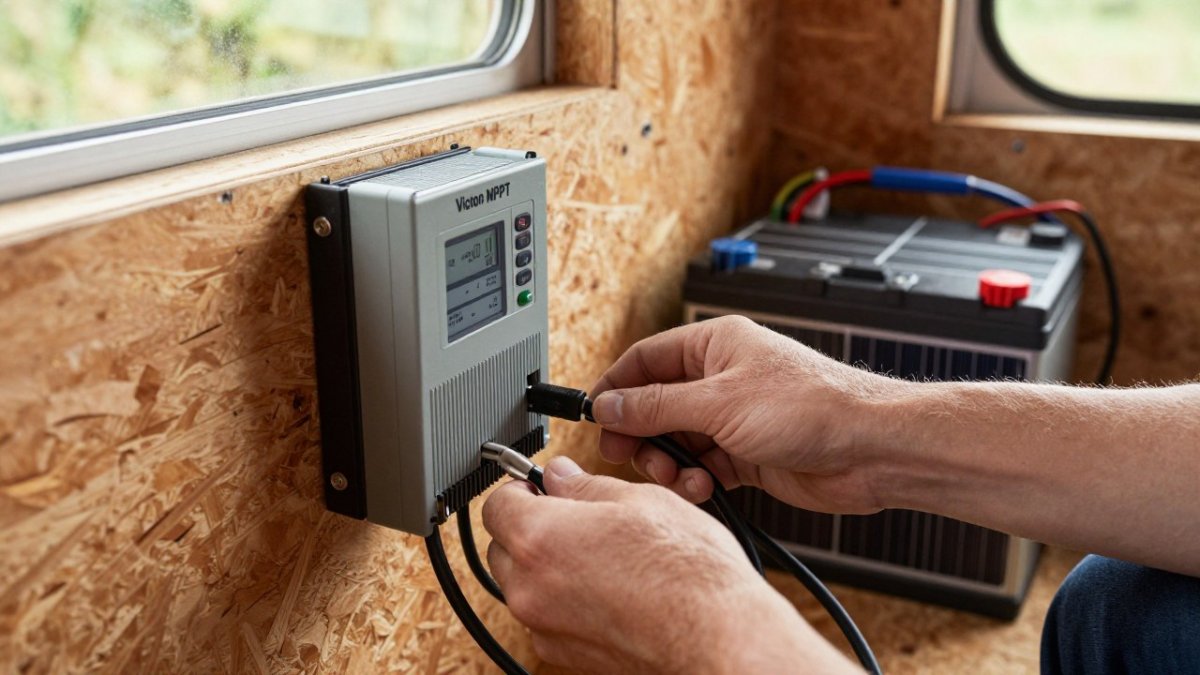
Component compatibility decides whether your system lasts. Every part must agree on system voltage, current limits, and surge capacity. The battery bank is the anchor: once you fix its voltage and usable capacity, the array, charge controller, and inverter all have to fit around it.
Size the Battery Bank by Usable Energy, Not Nominal Capacity
Battery labels advertise nominal capacity. What runs your loads is usable capacity, and that depends on chemistry and depth of discharge (DoD).
- Flooded lead-acid: plan on about 50% DoD for regular cycling. A 100 amp-hour, 12-volt battery stores about 1,200 watt-hours nominally but gives you roughly 600 watt-hours of usable energy before you shorten its life.
- AGM and gel: similar DoD limits, sealed and maintenance-free, but less tolerant of overcharging and heat.
- Lithium iron phosphate (LiFePO4): commonly rated for 80-100% DoD, so a 100 amp-hour, 12.8-volt battery delivers roughly 1,000-1,280 watt-hours usable. That is why a smaller lithium bank can replace a larger lead-acid bank.
Convert to watt-hours with volts times amp-hours. Then divide your daily watt-hours by usable capacity to see how many batteries you need for one day of autonomy.
Plan Days of Autonomy for Cloudy Weather
Days of autonomy is how long the bank carries your loads with no solar production. Most beginners underestimate it.
- 2-3 days is a common target for a full-time residence in a region with mixed weather.
- 1-2 days is often enough for a cabin or van that is not occupied every day, especially with a generator backup.
- 3-5 days makes sense where winter storms routinely block the sun for days and you want to avoid running a generator.
For the 1,330 watt-hour example, two days of autonomy means about 2,660 watt-hours of usable storage. At 80% DoD on LiFePO4, that is roughly 3,325 watt-hours of nominal capacity, about three 100 amp-hour, 12.8-volt batteries. On lead-acid at 50% DoD, the same load needs roughly 5,320 watt-hours nominal, or about four to five 100 amp-hour, 12-volt batteries.
Watch out: temperature changes usable capacity. Lithium loses charge acceptance in freezing conditions and should not be charged below freezing without a heated battery or low-temp cutoff; lead-acid loses capacity in cold and ages fast in heat. Mount the bank in a conditioned or insulated space and check the manufacturer's temperature limits.
Match the Charge Controller to the Bank
An MPPT charge controller converts panel voltage to battery voltage efficiently. Match its amp rating to your array's short-circuit current with headroom to spare. For lithium banks, check that the controller has a charging profile for your chemistry and can be set to the manufacturer's absorption and float voltages. Our article on choosing charge controllers for lithium batteries covers profile settings and voltage limits in detail.
Pick a Pure Sine Wave Inverter That Fits the Bank's Discharge Limit
A pure sine wave inverter delivers clean AC power that motors and electronics expect. Size it for surge, not just running watts. If you are matching an inverter to a surge-heavy load, this guide on RV inverter surge capacity shows how to calculate the number. For a plain comparison of inverter types, see pure sine wave vs modified sine wave.
Plan for Replacement and Expansion
Batteries are the first component to wear out. Lead-acid typically lasts a few years under daily cycling; LiFePO4 commonly lasts much longer, but both degrade faster with deep discharges and high heat. Buy batteries in a single batch, keep the bank balanced, and leave room in the rack and wiring for one more battery later. If you expect to add loads, size the charge controller and inverter for the future bank, not just today's.
Step 6: Wiring, Overcurrent Protection, and Code Compliance
Safety is where DIY builds fail inspection, and it is the part beginners most often skip. A reliable system is also a safe system: undersized wire, missing fuses, and poor grounding cause fires and failed inspections more often than bad panels.
Size Wire for Current and Voltage Drop
Wire gauge must carry the expected current without overheating, and it must keep voltage drop low enough that equipment sees the voltage it needs. Use the ampacity tables in your local electrical code and the manufacturer's lugs and terminals as your reference. As a rule of thumb, keep voltage drop on DC runs under about 3% and on AC runs under about 3-5%.
Put Overcurrent Protection on Every Circuit
Overcurrent protection is not optional. A common layout:
- Battery positive: a fuse or DC breaker rated for the bank's short-circuit current, mounted as close to the battery terminal as practical.
- Array to charge controller: a DC-rated fuse or breaker on the positive conductor, sized to the panel's maximum series fuse rating.
- Inverter DC input: a DC breaker or fuse sized to the inverter's continuous draw with headroom for surge.
Watch out: a fuse protects the wire, not the device. Size the fuse to the wire's ampacity so the wire is protected even if the device draws more than expected.
Ground and Bond the System
Grounding gives fault current a safe path and keeps metal enclosures from becoming live. Bond the equipment grounding conductor to the panel frames, the charge controller and inverter chassis, and the battery rack, and connect the system to a grounding electrode as your local electrical code requires. Do not ground the battery negative and the AC neutral at multiple points; follow the inverter and code instructions for a single bonding point.
Manage Battery Hazards
Flooded lead-acid batteries vent hydrogen and need ventilation and eye protection; spilled electrolyte is corrosive. Lithium banks need a battery management system (BMS) to prevent overcharge, overdischarge, and overcurrent, and they should be kept within the manufacturer's temperature range. Use insulated tools, remove jewelry, and disconnect the bank before working on wiring. Store and charge batteries away from ignition sources and combustible materials.
Permits, Inspection, and When to Hire a Licensed Electrician
Most jurisdictions require a permit and inspection for permanently installed electrical systems, and many require work to be done or signed off by a licensed electrician. Call your local building department before you buy wire. Ask three questions: does this system need a permit, what inspections are required, and can a homeowner do the work? Keep the answer in writing.
Step 7: Compare the Best Off-Grid Solar System Packages With Batteries
Pre-built packages save time but vary widely in quality. When comparing the best off-grid solar system packages with batteries, check these points:
- Battery chemistry and usable capacity
- Inverter surge rating
- Charge controller type and amp headroom
A package is only as good as its weakest component. Ask what happens when one part fails. Keep our off-grid troubleshooting guide handy for the first months of operation.
Plan Your Build With a Victron Specialist Before You Order
Getting the design right the first time saves money and frustration. A reliable off-grid power system comes from matching loads to components, not from buying the biggest panel on sale.
That is where Victron Guy comes in. As an authorized Victron Energy dealer, Victron Guy offers batteries, solar charge controllers, inverters, and monitoring systems, with technical support available by phone, text, email, and in person.
For current prices or a quote, visit the Victron Guy website. Pricing depends on quantity, dates, and delivery.
Frequently Asked Questions
How many days of battery backup should an off-grid power system have?
Most off-grid homes plan for two to three days of autonomy, meaning the battery bank covers average daily use for 48 to 72 hours without sun. In cloudy regions, three to five days is safer. Size usable capacity by dividing daily kilowatt-hours by the depth of discharge you plan to run, then multiply by your autonomy days. Lithium batteries tolerate 80 to 90 percent discharge, while lead-acid should stay near 50 percent, so lithium needs a smaller bank for the same backup.
How do I calculate the battery size for an off-grid solar system?
Start with daily energy consumption in kilowatt-hours from your appliance worksheet. Multiply by your days of autonomy, then divide by usable depth of discharge. A home using 10 kWh per day with two days of autonomy and 80 percent usable lithium capacity needs roughly 25 kWh of nominal battery capacity. Round up to the nearest available battery voltage and capacity, and confirm the bank's continuous discharge rating covers your peak load, not just average use.
What components are needed for a reliable off-grid power system?
A complete system includes solar panels and mounting, an MPPT charge controller, a battery bank sized for autonomy, a pure sine wave inverter, and DC and AC distribution with fuses, circuit breakers, a disconnect switch, and grounding. Add a battery monitor and, for cloudy stretches, a backup generator or charger. Every component must share a compatible system voltage, typically 12V for small vans, 24V for mid-size cabins, and 48V for whole homes.
Can I use an off-grid solar system sizing calculator instead of doing the math myself?
A calculator speeds up the work, but it only returns good numbers if your inputs are accurate. Enter real daily watt-hours from appliance labels or a plug-in meter, your location's peak sun hours, and your planned days of autonomy and depth of discharge. Use the calculator to check your hand math, then verify the result against component limits: charge controller amperage, inverter surge rating, and wire gauge. Treat the output as a starting point, not a final design.