 How-to
How to Troubleshoot a Victron Solar Charge Controller
Last Updated: November 1, 2026
Quick Summary
A victron charge controller that stops charging usually has a simple cause, not a failed unit. Check the display, battery voltage, and panel sunlight first, then confirm the charge profile and wiring. A full battery or a panel voltage too close to battery voltage can also halt charging by design.
- Start with the display or status light to see whether the controller has power.
- Panel voltage must sit above battery voltage before a charge cycle can begin.
- A battery that is already full will stop charging, which is correct behavior.
- Check the battery fuse, terminals, and wire gauge before suspecting the controller.
- Use VictronConnect to read live values and look up any error code in the manual.
Table of Contents
- Victron MPPT Showing Voltage But Not Charging: Causes and Fixes
- Checking Battery Voltage Detection and Charging Settings
- Using VictronConnect for Charge Controller Troubleshooting
- Testing Wiring, Fuses, and Connections Safely
- How to Perform a Victron Solar Charge Controller Reset
- Booking Help When Your Controller Still Won't Charge
- Frequently Asked Questions
When a victron charge controller stops charging, most people assume the unit has failed. In practice, the cause is usually something simple, such as a dim battery, a loose wire, or a setting that doesn't match the battery. This guide walks through a practical troubleshooting process, starting with a quick health check before you touch any wiring.
Work through the checks in order. Each step rules out a common cause, so you don't waste time on the wrong fix.
- Look at the display or status light first
- Confirm the battery is connected and reads a real voltage
- Check that panels are receiving sunlight
- Note any error code or warning on the screen
A dark display usually points to a power problem, not a charging problem. The Victron MPPT troubleshooting guide notes that a controller may appear inactive when its display is unlit, it is not charging, and it is not communicating (Victron Energy MPPT troubleshooting guide). That combination suggests the controller isn't getting enough power to start.
Watch out: Don't open the enclosure or reconnect wires while the system is live. Disconnect the panels or the battery in the right order before you inspect connections.
Victron MPPT Showing Voltage But Not Charging: Causes and Fixes
This is the most common complaint. The display shows panel voltage, but the battery never gains charge. Usually the controller can see the panels but decides not to send current to the battery. The key is to separate a victron charge controller decision (it is choosing not to charge) from a controller fault (it cannot charge).
Work through this symptom-led sequence. Stop at the first step that explains the behavior.
- Is the battery actually below its recharge point? A controller stops charging when the battery reaches its absorption or float setpoint. Check the battery's state of charge before assuming a fault. Check state of charge before assuming a fault.
- Is panel voltage high enough to start? The controller needs the array to sit above battery voltage before it begins a charge cycle. Panel voltage must sit above battery voltage for a charge cycle to begin. Compare panel voltage with battery voltage at the same moment; if the gap is small, the controller is waiting, not broken.
- Is the charge profile correct? A profile set for the wrong chemistry can hold the controller in a stage that never delivers current. Confirm battery type, system voltage, and absorption/float values against the battery maker's recommendation.
- Is the charging path intact? A blown battery fuse, a loose terminal, or a reversed connection can show panel voltage at the controller while blocking current to the battery. See the wiring section below.
- Is a status or error message present? Note any code in VictronConnect or on the display and look it up in the model manual before changing settings.
A useful field check: compare the controller's reported battery voltage with a multimeter reading at the battery terminals. A large difference points to a wiring or fuse problem between the controller and the battery, not a controller fault. If the controller reports a battery voltage that is clearly wrong (for example, 0V or a fixed value that does not change), the battery-side connection or the controller's voltage sense is the place to look.
If the battery is full, the controller is working correctly. It stops charging to protect the battery. Check the battery state of charge before you assume a fault.
The table below summarises the main causes of this symptom and the order in which to check them.
| Check | Symptom it explains | Fix |
|---|---|---|
| Battery state of charge | Battery already full, so controller stops charging | Confirm battery is below its recharge point |
| Panel voltage vs battery voltage | Controller is waiting, not broken | Panel voltage must sit above battery voltage to start |
| Charge profile | Wrong chemistry holds controller in a non-charging stage | Match battery type, system voltage, and absorption/float values |
| Charging path | Panel voltage shows but no battery current | Check battery fuse, loose terminals, and reversed connections |
| Status or error message | Controller reports a fault code | Look up the code in VictronConnect and the model manual |
Checking Battery Voltage Detection and Charging Settings
A controller can only charge correctly if it knows what battery it's charging. A wrong setting is one of the quickest ways to create a "not charging" problem.
Confirm these settings:
- Battery type (lead-acid, AGM, gel, or lithium)
- System voltage (12V, 24V, or 48V)
- Absorption and float voltages that match the battery maker's recommendation
If your battery is lithium, use a charging profile built for lithium. You can compare lithium battery charge controller options to see which settings suit your chemistry. A lead-acid profile can undercharge or stress a lithium pack.
Also check the battery temperature sensor, if your model uses one. A missing or faulty sensor can change charging behavior.
Using VictronConnect for Charge Controller Troubleshooting
VictronConnect is the app that shows what the controller sees and lets you change its settings. It is often the fastest way to find the problem.
Open the app and look at the live readings: panel voltage, battery voltage, charge current, and any status message. Compare these numbers with what you expect for the current weather and battery level. A status message such as "bulk," "absorption," or "float" tells you what stage the controller is in.
If you need centralized readings across several devices, a monitoring unit can help.
Note any error code on the screen or in the app. Look up that code in Victron's manual before changing settings, because the meaning depends on your model.
Testing Wiring, Fuses, and Connections Safely
Bad wiring causes many charging faults, and it can be dangerous to test. For a checklist of marine solar wiring best practices, see the guide before you start. Work carefully, and turn off the system before you touch any terminal. The goal of this section is to help you find a wiring fault without guessing and without putting yourself at risk.
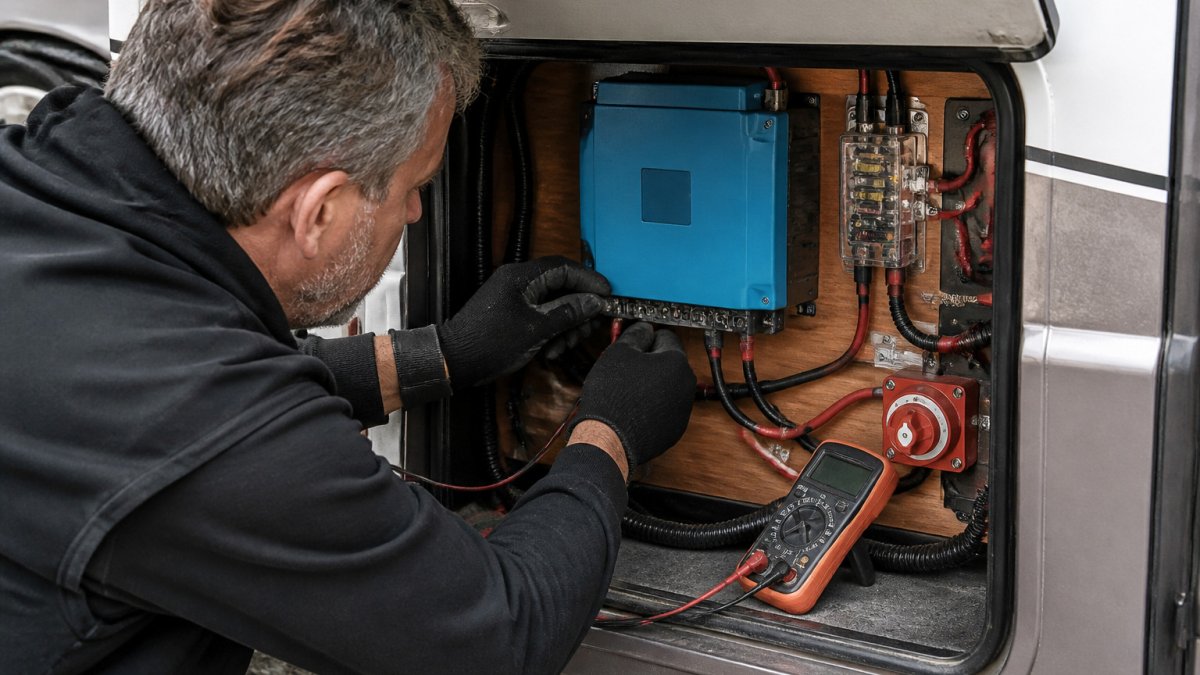
!A technician in work gloves inspecting cable connections on a solar charge controller mounted inside an RV utility compartment, with a multimeter resting nearby
Isolate before you inspect. Disconnect the panels first, then the battery. This order matters: the panels are the energy source, and disconnecting the battery first on some controllers can leave the controller unpowered while the array is still live. Confirm the controller display is dark before touching terminals.
Visual checks, in order:
- Battery fuse intact and seated
- Terminals tight, clean, and free of corrosion or heat discoloration
- Wire gauge suits the current and the run length
- No reversed polarity at the controller or battery
- Strain relief and cable entry points not chafing
Safe multimeter checks. With the system isolated, use the multimeter's continuity or resistance mode to confirm fuse integrity and to check for open circuits in each cable. With the system reconnected and running, measure DC voltage at the controller's battery terminals and at the battery posts. A difference of more than a few tenths of a volt under charge current points to resistance in the path, a loose terminal, undersized cable, or a failing fuse holder. Measure panel voltage at the controller's PV terminals and compare it with the array's expected open-circuit voltage for the current light and temperature.
Older RVs and boats often have wiring that doesn't meet current standards. Our guide to whether solar works with old wiring covers what to check before adding components. If you're unsure whether your existing wiring can handle a solar system, have a qualified technician review it before you add new components.
If the visual and voltage-drop checks are clean and the controller still will not charge, the fault is more likely in settings or the controller itself. Move to the settings and reset sections above rather than continuing to re-test the same connections.
How to Perform a Victron Solar Charge Controller Reset
Sometimes a controller needs a restart to clear a stuck state. A reset is a safe step after you've checked wiring and settings.
The general steps are:
- Disconnect the panels from the controller
- Disconnect the battery
- Wait at least a minute so the internal power drains
- Reconnect the battery first, then the panels
Check the display after the restart. If the controller still shows the same fault, note the message and move on to the settings and wiring checks above. The exact reset process can vary by model, so confirm the steps in your product manual.
Booking Help When Your Controller Still Won't Charge
If the controller still won't charge after these checks, a technician can often find the problem faster than trial and error. Technical support is available by phone, text, email, and in person, so you can talk through your setup and readings with someone who knows Victron equipment.
Before you call, have these details ready:
- The controller model and firmware version
- Battery type and system voltage
- Panel configuration and total array size
- Any error codes, and what the app showed
Shipping is free on all Victron products. Sales tax does not apply except in California. Pricing depends on the model and quantity, so check the current price on our website or ask for a quote.
Frequently Asked Questions
Why is my Victron solar charge controller not charging?
The most common causes are a battery that is already full, battery voltage set incorrectly in the controller, low solar input from shade or dirty panels, or a loose connection on the PV or battery terminals. Start by confirming the controller shows a PV voltage at least a few volts above battery voltage, then check the charging status on the display or in VictronConnect. If the controller shows voltage but no charging current, verify the battery type and charge settings match your battery chemistry. Pricing for replacement parts depends on the model and availability, so check Victron Guy's website for current options or request a quote.
How do I reset a Victron solar charge controller?
Restart steps vary by model, so confirm the reset procedure for your controller in its product manual. This clears a temporary fault and lets the controller re-detect the system voltage. Before resetting, note any error codes on the display or in VictronConnect so you can compare them against the manual. A full factory reset should only be done if the manual for your specific model recommends it, since it erases custom charge settings.
Why does my Victron charge controller shut down when connected to the battery?
Shutdown when connecting to the battery usually points to a wiring problem, a battery voltage outside the controller's operating range, or a fuse or breaker that is tripping. Check that the positive and negative battery cables are tight, the correct gauge for the current, and protected by a fuse sized to the controller's rating. Measure battery voltage with a multimeter before connecting. If the battery is deeply discharged, the controller may not start until the battery is brought back up with a suitable charger.
How can I check whether my Victron MPPT is detecting the battery?
Open VictronConnect and check the battery voltage reading shown on the dashboard. If it matches a multimeter measurement at the battery terminals, detection is working. If the reading is zero or far off, inspect the battery sense wiring and terminal connections. Also confirm the battery voltage setting matches your battery type, such as lithium or lead-acid, because a mismatch can prevent the controller from charging correctly even when the battery is detected.