 How-to
How to Connect Lithium Batteries in an RV: Step-by-Step
Table of Contents
- What You'll Need Before You Connect Lithium Batteries
- How to Convert RV Batteries to Lithium: Planning the Upgrade
- RV Lithium Battery Series vs Parallel: Choosing Your Configuration
- RV Lithium Battery Cable Size, Fuses, and Voltage Drop
- Step-by-Step: Disconnecting, Wiring, and Connecting Terminals Safely
- RV Lithium Battery Charger Settings and Charging Compatibility
- Troubleshooting BMS Shutdowns and Charging Faults
- Frequently Asked Questions
Last Updated: October 18, 2026
What You'll Need Before You Connect Lithium Batteries
Connecting lithium batteries in an RV comes down to four things: the right tools, a clear plan, correct cable sizing, and a charging system that speaks lithium. Get those right and the install is a weekend job; skip one and you'll chase faults for months.
Below, we'll show you exactly how to connect lithium batteries in an RV, from first disconnect to final commissioning check, whether you're running one battery or four.
Tools and Safety Gear Checklist
Gather these before you start, most are cheap and all make the job safer.
- Insulated wrench and socket set
- Torque wrench (terminal specs matter)
- Digital multimeter
That last item isn't trivial: a photo of the original layout saves an hour when you're reconnecting and can't remember which cable went where.
How to Convert RV Batteries to Lithium: Planning the Upgrade
Converting RV batteries to lithium starts with an audit, not a purchase. Before buying anything, map what your RV already has: the converter or charger model, solar charge controller, inverter, and alternator charging path.
Write down every charge source and load, then check each against the new battery's requirements. Many RVers find the converter is the weak link, since older units often lack a lithium profile.
Here's what the planning stage covers:
- Charge sources: converter, solar, alternator, shore power
- Loads: inverter size, appliance draw, DC circuits
- Monitoring: a shunt or battery monitor so you can see state of charge
RV Lithium Battery Series vs Parallel: Choosing Your Configuration
RV lithium battery series vs parallel comes down to one question: are you raising voltage or capacity?
Series suits 24- or 48-volt systems; parallel suits the standard 12-volt house bank running your lights, fans, and inverter.
| Configuration | Voltage | Capacity (amp-hours) | Best For |
|---|---|---|---|
| Series | Adds up | Stays the same | 24V or 48V systems |
| Parallel | Stays the same | Adds up | 12V RV house banks |
| Series-parallel | Adds up | Adds up | Larger banks at higher voltage |
One rule matters more than any other: use equal-length cables. A battery closer to the bus bar carries more current and ages faster; equal-length cables keep the load balanced.
Wiring One, Two, and Four Batteries
One battery: positive to the positive bus, negative to the negative bus, with the positive cable fused close to the battery.
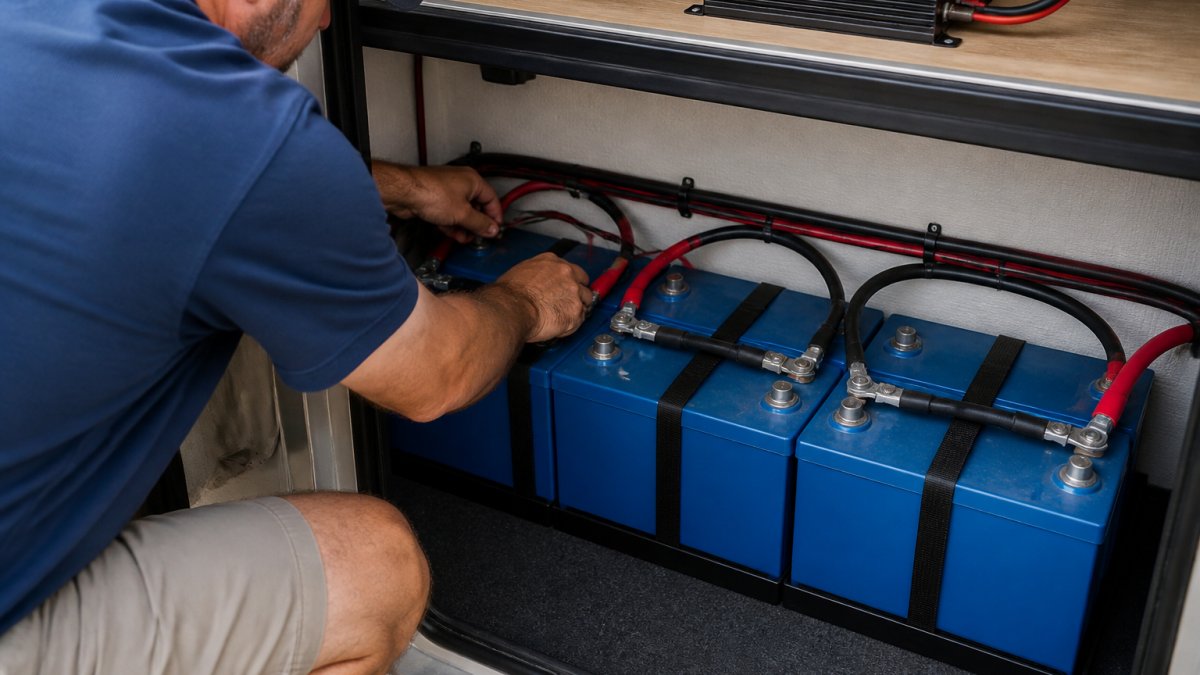
Two batteries in parallel: positive to positive, negative to negative. Take the main positive feed from battery one and the main negative feed from battery two.
Four batteries in parallel: link all positives and all negatives, then pull the main feeds from opposite corners.
RV Lithium Battery Cable Size, Fuses, and Voltage Drop
RV lithium battery cable size depends on current and run length, not habit. Undersized cable causes voltage drop, which makes chargers underperform and inverters trip. Size for worst-case current, then add margin, a few minutes of math prevents months of faults.
Step 1: Add Up the Worst-Case Current
Start with the inverter, almost always the largest single load. A 2,000-watt inverter at 12 volts DC pulls roughly 167 amps at full output; at 90 percent efficiency it's closer to 185 amps. A 3,000-watt inverter lands near 250 to 280 amps.
Do not size to the average load. Size to the worst case the system can actually produce, then round up.
Step 2: Measure the Round-Trip Length
Voltage drop depends on the total path: positive cable from battery to load plus negative back to battery. A 6-foot one-way run is a 12-foot round trip. Measure the actual route, including bends and pass-throughs, not the straight-line distance.
Step 3: Pick the Gauge
Use this as a practical starting point for short 12-volt RV runs, conservative working numbers, not a substitute for the manufacturer's ampacity table.
| Design current | Round-trip run under 10 ft | Round-trip run 10-20 ft |
|---|---|---|
| Up to 100 A | 4 AWG | 2 AWG |
| 100-200 A | 2 AWG | 1/0 AWG |
| 200-300 A | 1/0 AWG | 2/0 AWG |
| 300-400 A | 2/0 AWG | 4/0 AWG |
For runs over 20 feet, go up one gauge. For inverter feeds, target no more than 2 to 3 percent voltage drop at full load; 3 percent is a common ceiling for general DC circuits. To check the math:
Vdrop = (2 × L × I × R) ÷ 1,000
where L is one-way length in feet, I is current in amps, and R is cable resistance in ohms per 1,000 feet from the manufacturer's table. Keep the result under your target percentage of system voltage.
Step 4: Fuse the Positive Cable at the Battery End
The fuse protects the cable, so it must never be rated higher than the cable can carry.
Size the fuse above expected continuous current but below the cable's ampacity. A 2/0 cable feeding a 3,000-watt inverter typically pairs with a 300-amp Class T fuse; a 4 AWG feed to a DC distribution panel commonly uses 100 amps. Confirm against the cable maker's table.
A Note on Voltage Drop and Charging
Voltage drop also fools chargers. A converter outputting 14.4 volts at its terminals may deliver only 13.6 volts at the battery on a long, thin run, so the battery never reaches full charge. If your bank consistently stops short of 100 percent, measure voltage at the battery terminals under charge before blaming the charger, the fix is often a shorter or thicker charge cable.
Quick Sizing Checklist
- Worst-case current calculated from inverter plus simultaneous DC loads
- Round-trip cable length measured along the actual route
- Gauge selected from a table or the manufacturer's ampacity chart
Step-by-Step: Disconnecting, Wiring, and Connecting Terminals Safely
Safe connection follows a fixed order: isolate, disconnect, verify, wire, torque, then commission. That sequence avoids the two failures that cause most damage, reversed polarity and shorted terminals. The steps work whether you're installing one battery or four.
Phase 1: Isolate and Disconnect
- Isolate all charging sources. Turn off the converter, shut down solar at the breaker, disconnect shore power, and disable any alternator charging path at the DC-to-DC charger or ignition-controlled relay.
- Disconnect the negative terminal first. This breaks the circuit before you touch the positive. Use an insulated wrench and keep it from bridging the positive post and the case.
- Remove the old batteries and inspect for corrosion, loose hold-downs, and damaged lugs. Replace any lug that is cracked or heat-discolored.
- Photograph the original layout before pulling the last cable, it saves an hour when you're reconnecting and can't remember which cable went where.
Phase 2: Mount and Lay Out the Bank
- Mount the new batteries per your plan, leaving room for cable bends and the fuse holder. Secure them so they cannot shift under braking.
- Dry-fit the cables before crimping. Route each along its final path and check it reaches without strain. Equal-length cables are the goal for parallel connections, so measure twice.
Phase 3: Wire One, Two, or Four Batteries
Here is the layout for each bank size. In every case, the main positive feed goes to a fuse, then the bus or disconnect, and the main negative goes to the shunt or bus.
One battery
- Positive terminal to a Class T fuse, then the positive bus or disconnect.
- Negative terminal to the shunt, then the negative bus.
- Loads and charge sources connect to the bus, not the battery post.
Two batteries in parallel
- Positive to positive, negative to negative, using equal-length cables.
- Take the main positive feed from battery one and the main negative from battery two, that diagonal pull balances the pair.
- Fuse the main positive feed at the battery end.
Four batteries in parallel
- Link all positives and all negatives with equal-length cables.
- Pull the main positive feed from one corner and the main negative from the opposite corner to keep the current path balanced across all four.
- Keep every connecting cable the same length and gauge.
Label every cable as you go, using a label maker or tape and a marker. Label both ends. When you are on your back in a battery compartment, a label is worth more than a memory.
Phase 4: Torque and Verify
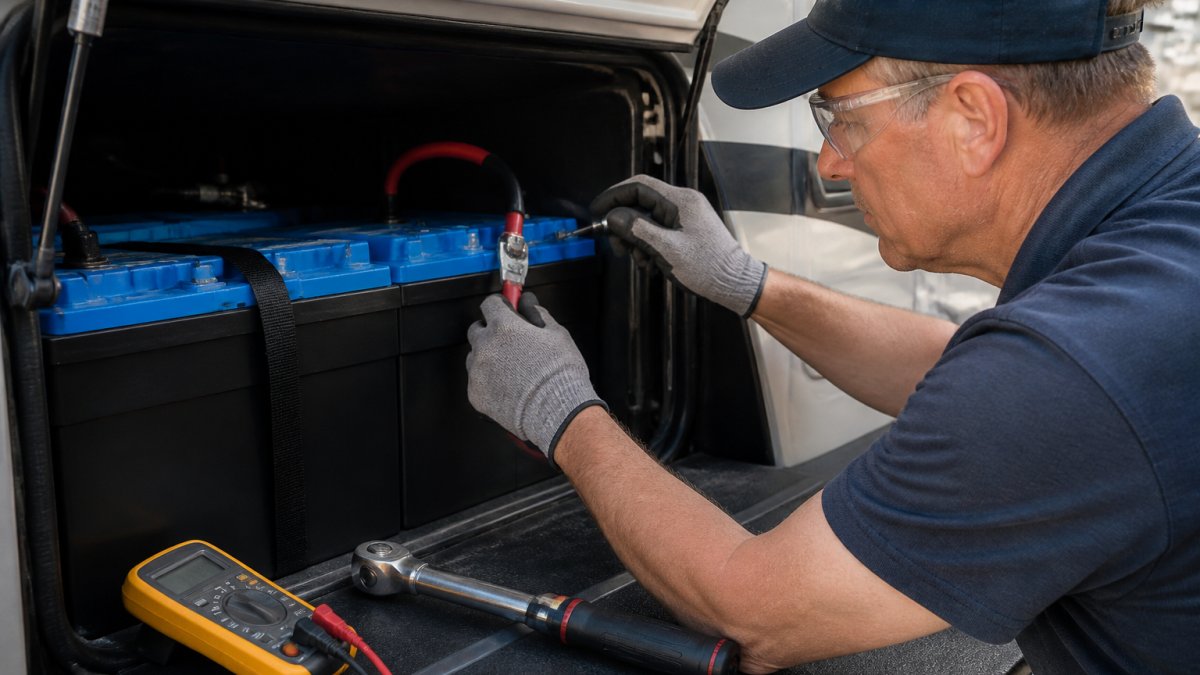
- Torque the terminals to the battery maker's spec. Loose terminals cause heat, voltage sag, and arcing on a lithium bank. Use a torque wrench, not a guess.
- Verify polarity with a multimeter before connecting the main feed: positive to positive, negative to negative, no stray voltage on the case. Check each battery, then the bank.
- Reconnect the negative terminal last.
Phase 5: Commissioning Checklist
Bring the system online one source at a time, watching the battery monitor as each comes on. This catches reversed polarity, loose connections, and missing protection before they become a repair bill.
- All charging sources isolated before first power-up
- Polarity verified at each battery and at the bank
- Main positive fuse installed and rated correctly
A single reversed cable can destroy a BMS or an inverter in seconds. Check polarity with a meter before the first connection, not after. It takes ten seconds and saves a repair bill.
What to Do If Something Is Wrong at Commissioning
If the monitor shows current flowing the wrong way, stop and recheck polarity. If a terminal gets hot within minutes, shut down and re-torque or replace the lug. If the charger faults out, check voltage at the battery terminals first, a long, thin charge cable can make the charger see a higher voltage than the battery does. If the BMS shuts down on first charge, confirm the profile is set to lithium and the battery is above its low-temperature cutoff.
RV Lithium Battery Charger Settings and Charging Compatibility
RV lithium battery charger settings must match the battery's charge profile. LiFePO4 wants a different absorption voltage and no equalization cycle.
Check these before first charge:
- Converter or charger: does it have a lithium mode?
- Solar charge controller: can you set a custom charge profile?
- Alternator charging: is there a DC-to-DC charger or lithium-compatible regulator?
That last point catches people out: cold-weather charging protection isn't optional if you camp in shoulder seasons.
Charging compatibility is where cheap installs fail. A charger that can't be set to lithium will fight the BMS on every cycle.
Troubleshooting BMS Shutdowns and Charging Faults
Most BMS shutdowns trace to four causes: overvoltage from a wrong charge profile, overcurrent from undersized cable, low-temperature charging, or cell imbalance.
Start with the obvious checks:
- Battery won't charge: confirm charger profile, then check temperature cutoff.
- Battery shuts down under load: check cable gauge and fuse rating against actual current.
- Charger faults out: look for voltage drop on long cable runs.
A shunt-based battery monitor shows you what the BMS sees; without one, you're guessing.
If you're stuck, buying from a dealer with real technical support pays off. At Victron Guy, we provide expert technical support via phone, text, or email.
Frequently Asked Questions
Can you connect lithium batteries in series or parallel in an RV?
Both are possible, and the choice depends on your system voltage and capacity goals. Series connection adds voltage (two 12-volt batteries become 24 volts), while parallel connection adds capacity in amp-hours at the same voltage. Most 12-volt RV systems use parallel connections to grow runtime. If you connect lithium batteries in series, confirm each battery's BMS supports series use and keep all cables equal length to balance current flow.
Do I need a special charger for lithium batteries in my RV?
You need a charger, converter, or solar charge controller with a lithium charging profile. LiFePO4 batteries want a bulk/absorption voltage around 14.2 to 14.6 volts and no equalization stage. Many older RV converters lack a lithium setting, so check your model's charging profile before you connect lithium batteries. A charger stuck in a lead-acid profile can leave the bank undercharged or hold it at a voltage the BMS rejects.
Which battery terminal should I connect first on an RV?
When reconnecting, attach the positive cable first, then the negative cable, and torque each terminal to the battery manufacturer's spec. When disconnecting, reverse it: negative first, then positive. This order reduces the chance of a short through a wrench touching the frame. After connecting lithium batteries, verify polarity with a multimeter before you close the battery compartment or power up the inverter.
How do you size cables for an RV lithium battery bank?
Size cables for the highest current the bank will carry, then check voltage drop over the run length. A 12-volt system running a 2,000-watt inverter can pull roughly 170 amps at full load, which points to 2/0 AWG or larger for short runs. Keep all parallel connecting cables equal length and gauge so current divides evenly. Fuse the positive cable at the battery terminal, sized to protect the cable, not the load.
Connecting lithium batteries in an RV is a planning problem disguised as a wiring job. Get the configuration, cable sizing, and charging compatibility right, and the install runs clean for years.
If you'd rather have expert eyes on your setup, Victron Guy can help. As an authorized Victron Energy dealer, we offer free shipping on all Victron products and hands-on technical support via phone, text, email, or in person. Get started with Victron Guy and build a battery bank you can trust off-grid.