 how-to
RV Solar Panel Mounting Tips: A Step-by-Step Guide
Table of Contents
- Assess Your Roof and Plan the Layout
- Choose Your Solar Panel Mounting Method
- Prepare Your Roof Surface and Materials
- Install 3M VHB Tape for Solar Panel Adhesion
- Apply RV Roof Solar Panel Sealant Best Practices
- Account for RV Solar Panel Wind Load Considerations
- Manage Wiring, Cable Entry, and Load Distribution
- Post-Installation Maintenance and Inspection Checklist
- Frequently Asked Questions
Last Updated: September 30, 2026
Assess Your Roof and Plan the Layout
Walk your roof and check for soft spots, rust, or damage. Sketch your layout, marking water pooling areas, vents, AC units, and shade patterns, shading from even small obstructions cuts output by 20-30%. Measure available space and confirm your roof can handle 400-600 pounds safely (check your owner's manual). Document your roof material (fiberglass, EPDM rubber, or metal), as each requires different mounting and adhesive approaches.
Choose Your Solar Panel Mounting Method
Your mounting method depends on roof type, budget, and permanence preference. The two main approaches, drilling and non-drilling, each have trade-offs.
Drilling vs. Non-Drilling Techniques
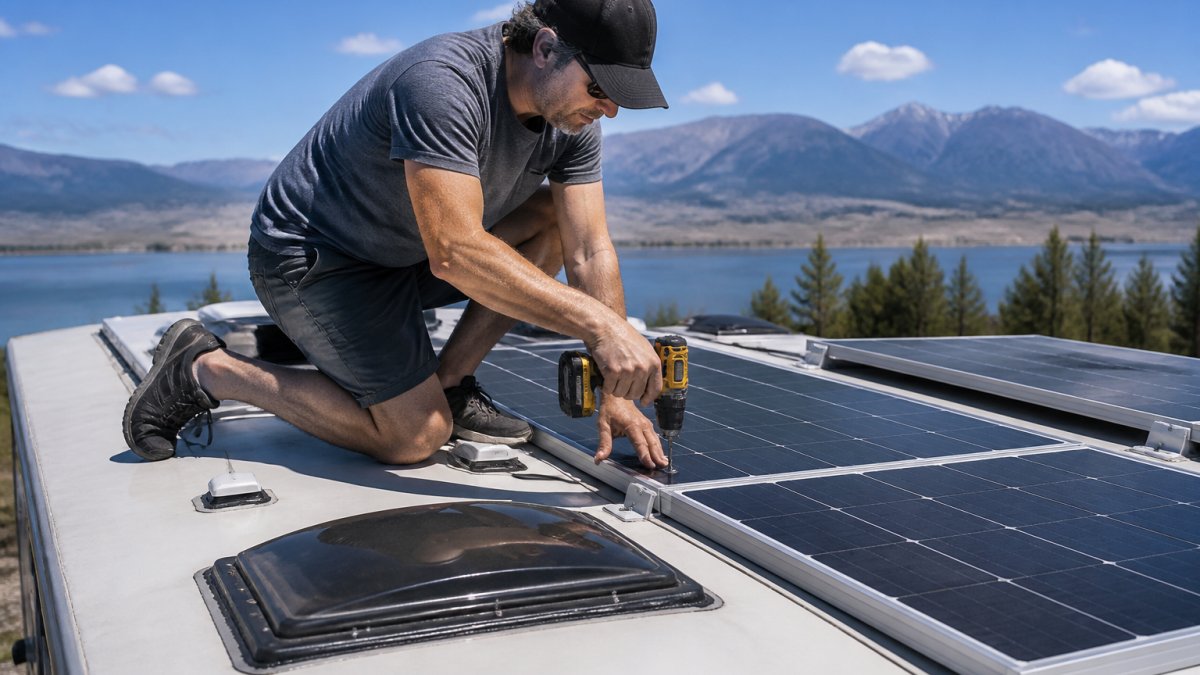
Drilling bolts mounting feet directly to your roof frame, distributing weight evenly and handling high wind loads well, but every hole is a potential leak point. Non-drilling uses 3M VHB tape to bond hardware directly to the roof surface, faster setup with no penetrations, but adhesive weakens in extreme heat or cold and doesn't handle wind loads as aggressively. Hybrid mounting combines adhesive with self-tapping screws for redundancy, offering ease of installation plus structural security.
Prepare Your Roof Surface and Materials
Each roof material has different surface properties, thermal expansion rates, and adhesive compatibility. Identifying your roof type before purchasing hardware prevents costly mistakes.
Identify Your Roof Material
Fiberglass roofs are rigid, handle drilling well, and bond reliably with most adhesives. Drill at low speed (under 500 RPM) using self-tapping screws rated for fiberglass to avoid cracking. Adhesives cure in 24 hours.
EPDM rubber roofs are flexible but adhesives soften above 140°F and thermal expansion stresses bonds over time. Use hybrid mounting (adhesive plus self-tapping screws) and only products specifically rated for EPDM rubber.
TPO roofs bond well with compatible adhesives but are sensitive to polyurethane sealants, which degrade TPO over time. Use silicone-based sealants and larger washers to distribute load when drilling.
Aluminum roofs conduct heat rapidly, weakening adhesive bonds. Use stainless steel fasteners only (galvanized hardware rusts).
Material-Specific Surface Preparation
For fiberglass and TPO: Clean with isopropyl alcohol. Scrub fiberglass gently with a soft brush if waxy. Dry 15-30 minutes depending on humidity. Use a template to ensure consistent hole spacing when drilling.
Gather Material-Specific Hardware and Adhesives
Your roof material determines which fasteners and adhesives work:
- Fiberglass: Self-tapping screws (stainless steel, #10 or #12 gauge), 3M VHB tape, polyurethane sealant (Sikaflex or equivalent)
- EPDM: Self-tapping screws (stainless steel) plus adhesive for redundancy, 3M VHB tape (EPDM-compatible formula), silicone sealant (check compatibility with EPDM)
- TPO: Self-tapping screws (stainless steel), 3M VHB tape (TPO-rated), silicone sealant (polyurethane can degrade TPO)
- Aluminum: Stainless steel bolts with large washers (never galvanized), adhesive rated for metal surfaces, polyurethane sealant
All fasteners must be stainless steel (316 grade preferred for coastal areas). Galvanized or mild steel fasteners corrode under your RV and create rust stains and structural weakness.
Pre-Installation Checklist
Before you drill or apply adhesive:
- Confirm your roof material by checking your RV manual or manufacturer documentation
- Test your adhesive or sealant on a hidden area of your roof to verify compatibility
- Verify all fasteners are stainless steel
- Check weather forecast; don't install during rain or if rain is predicted within 48 hours
- Ensure roof temperature is between 50°F and 85°F during installation (adhesives cure poorly outside this range)
- Have all materials on hand and organized before you climb on the roof
Install 3M VHB Tape for Solar Panel Adhesion
VHB tape is the standard for non-drilling solar panel mounting. Cut strips to length, apply to mounting feet, and press firmly for 30 seconds per strip. Position feet on the roof according to your layout and press each down hard for one minute. The bond strengthens over 24 hours; don't load the system immediately.
Apply RV Roof Solar Panel Sealant Best Practices
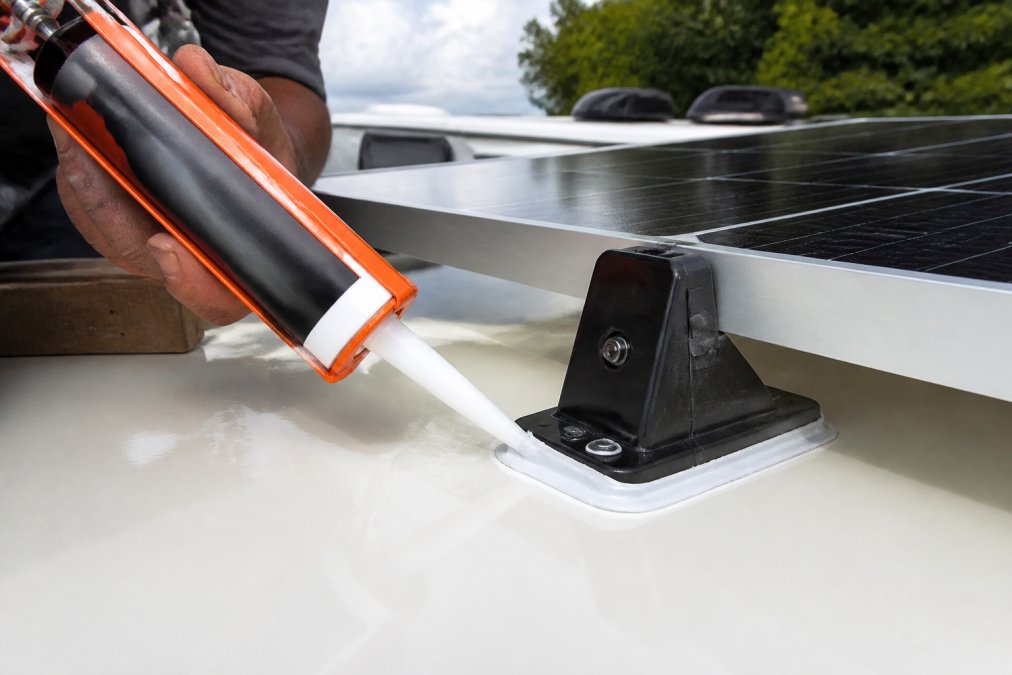
Seal every potential water entry point with marine-grade sealant rated for RV roofs and UV exposure. Run a continuous bead around each mounting foot base and smooth with a wet finger. For drilled holes, apply sealant under the foot and around the bolt head for a double seal. Cure 24-48 hours before rain exposure.
Account for RV Solar Panel Wind Load Considerations
Wind load is the primary threat to solar panel mounting systems. Your RV roof must structurally support the total weight of panels, hardware, and wind forces combined.
Calculate Your Total System Weight
A 400-watt system (four 100-watt panels) weighs roughly 80-90 pounds plus 15-25 pounds of hardware, totaling 100-120 pounds. However, wind forces multiply the effective load dramatically: a 400-watt array in a 50-mph wind experiences uplift forces of 400-600 pounds, far exceeding the panels' static weight.
Understand Your RV Roof's Load-Bearing Capacity
Most RV roofs are engineered to support their own weight plus light foot traffic and HVAC equipment. They are not engineered for concentrated solar panel loads or sustained wind forces.
Calculate Wind Load on Your Panels
Wind load approximations: 50-mph wind = 12-15 pounds per square foot; 60-mph = 17-22 pounds; 70-mph = 24-30 pounds. A four-panel 400-watt system (68 square feet) experiences 800-1,000 pounds of uplift in a 50-mph wind and 1,600-2,000 pounds in a 70-mph wind.
Design Mounting Foot Placement for Load Distribution
Distribute weight evenly across your roof structure. Do not cluster all mounting feet in one area.
Select Hardware Rated for Wind Load
Mounting hardware must be rated for at least 1.5 times your calculated wind load. If your system experiences 1,000 pounds of uplift force, your mounting feet and fasteners must be rated for 1,500 pounds or more.
Account for Vibration and Fatigue
Sustained vibration loosens fasteners and fatigues materials. Use vibration-dampening pads to reduce stress. Check fastener torque every six months with a torque wrench: #10 screws to 8-12 inch-pounds, #12 screws to 12-18 inch-pounds. Do not over-torque.
Assess Your Travel Patterns and Wind Exposure
High-wind environments (coastal areas, open plains, mountain passes, highway travel) require heavy-duty hardware rated for 70+ mph winds and hybrid mounting. Low-wind environments (sheltered campgrounds, forest areas, seasonal use) may allow standard hardware, but hybrid mounting is still recommended. Monitor your system while traveling; inspect fasteners immediately if you notice vibration, movement, or noise.
Manage Wiring, Cable Entry, and Load Distribution
Run wiring in PVC conduit or split loom tubing along existing roof rails. Use dedicated cable entry housing sealed with marine sealant where wiring enters your RV. Use appropriately sized wire (10-gauge for 400-watt arrays, 8-gauge or thicker for larger systems). Label every connection with weatherproof labels. Distribute wiring weight evenly across the roof.
Post-Installation Maintenance and Inspection Checklist
Check your system monthly during peak season and quarterly during off-season. Monthly: inspect mounting feet for movement, check sealant for cracks, clear debris from panels, test electrical connections. Quarterly: clean panels, inspect wiring, check vibration pads, verify cable management. Annual: reapply sealant, test output, inspect roof for water stains, review charge controller logs.
Frequently Asked Questions
Can I use 3M VHB tape to mount solar panels on an RV roof?
Yes, 3M VHB tape is an excellent adhesive option for solar panel installation when your roof material and curvature allow it. VHB tape provides a watertight seal without drilling penetrations, reducing leak risk. However, surface preparation is critical, clean the roof thoroughly with isopropyl alcohol and ensure the tape is applied to a clean, dry surface. VHB tape works best on fiberglass and metal roofs; EPDM rubber roofs may require additional mechanical fastening or a different adhesive sealant approach due to flexibility and UV exposure.
Is it better to bolt or glue solar panels to an RV roof?
Both methods work, but the choice depends on your roof material and long-term goals. Bolted Z-brackets offer superior structural integrity and easier removal, making them ideal for fiberglass roofs and situations where you may upgrade panels later. Adhesive sealant with VHB tape eliminates roof penetrations, reducing leak risk and maintenance concerns. Many RVers use a hybrid approach: adhesive for initial bonding plus self-tapping screws or bolts for vibration dampening and wind load resistance. Consult your RV manufacturer's guidelines, as some roofs have weight distribution limits or warranty restrictions on mounting methods.
How do I account for roof curvature when installing solar panels?
Roof curvature is one of the biggest challenges in RV solar mounting. Measure the curve at multiple points along your planned panel layout using a straightedge and measuring tape. For slight curves, adhesive sealant with flexible mounting feet can bridge small gaps. For pronounced curvature, use adjustable mounting feet or shims to level the array and ensure even load distribution. Z-bracket systems with adjustable feet are especially helpful here. Uneven surfaces create stress on solder joints and structural integrity, so take time to measure twice and plan for proper panel tilt to maximize solar array efficiency.
What should I do if my RV has an old wiring system, will a new solar setup work with existing electrical infrastructure?
Older RV wiring may have compatibility issues with modern MPPT controllers and lithium battery systems. Before purchasing, have a technician inspect your existing wiring for proper gauge, condition, and grounding. You may need to upgrade cable management, add a new wiring harness, or install dedicated circuit protection. Victron Guy's technical support team (available via phone, text, email, or in-person) can assess your current setup and recommend whether you need a partial rewire or a more comprehensive upgrade to safely integrate new solar components.