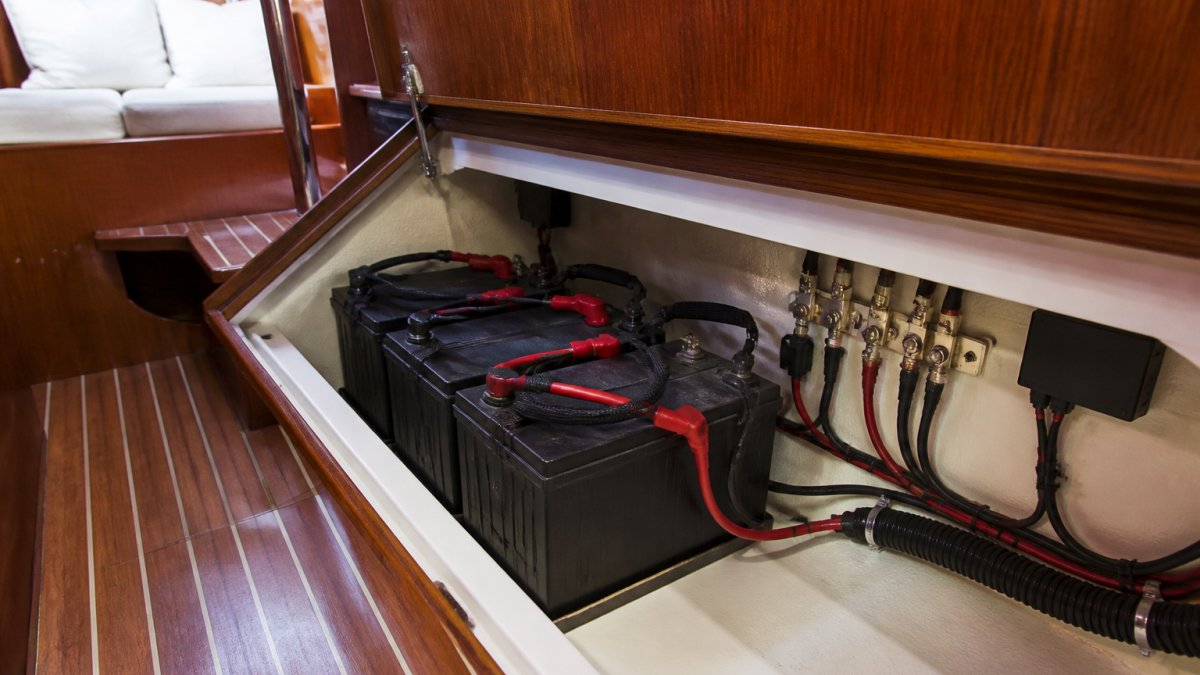
 How-to
Marine Battery Monitoring System Benefits
Table of Contents
- What a Marine Battery Monitoring System Does
- Why Battery Monitoring Matters on Boats
- Understanding Battery Monitor Shunt Technology
- How to Read Battery State of Charge Accurately
- Lithium Marine Battery BMS Integration
- Battery Monitor Installation and Setup
- Real-World Benefits: How Monitoring Extends Battery Life
- Frequently Asked Questions
Last Updated: October 17, 2026
What a Marine Battery Monitoring System Does
A marine battery monitoring system tracks your boat's battery health and performance in real time, voltage, current flow, and remaining capacity, so you know exactly how much power you have.
Most marine battery monitoring systems also track state of charge (percentage of usable power remaining). Some advanced models monitor battery temperature and individual cell voltage, especially important for lithium marine battery setups.
Why Battery Monitoring Matters on Boats
Running out of power on the water means dead navigation systems, no refrigeration, no water pumps, and no way to call for help. A marine battery monitoring system prevents that by showing you when to charge or reduce load.
Most boat owners underestimate how fast their battery discharges under load, a single AC unit or microwave can drain a bank in hours.
Battery monitoring also extends lifespan. Lead-acid batteries suffer permanent damage from deep discharge, and lithium batteries still benefit from avoiding unnecessary stress.
Here's what monitoring prevents:
- Unexpected power loss during critical operations
- Deep discharge damage that cuts battery life in half
- Overcharging from solar or alternator systems
For full-time cruisers and liveaboards, battery monitoring is not optional. It's the difference between a comfortable trip and a stranded boat.
Understanding Battery Monitor Shunt Technology
A battery shunt is a small, precision resistor installed in series with your battery bank.
This shunt-based approach is the most accurate way to measure battery current and works with any chemistry, lead-acid, lithium, or hybrid.
The display unit connects to the shunt via a two-wire cable and calculates useful metrics:
- Instantaneous current (amps in or out)
- State of charge (percentage remaining)
- Time remaining at current discharge rate
Some advanced monitors also measure individual cell voltage in lithium systems, giving early warning of cell imbalance or failure before it becomes a safety issue.
How to Read Battery State of Charge Accurately
State of charge tells you what percentage of your battery's capacity is still available: 100% means fully charged, 20% means you've used 80%. But it's an estimate, not a measurement, understanding how it's produced and where it goes wrong separates a useful monitor from a false sense of security.
How the Monitor Calculates State of Charge
A shunt-based monitor doesn't measure state of charge directly. It measures current and voltage, then estimates state of charge by counting amp-hours in and out of the bank (coulomb counting), with voltage used to resync at full charge. Accuracy depends on several inputs:
- Battery capacity setting. Tell the monitor you have a 400 Ah bank when it's really 300 Ah and state of charge will be off by roughly 25% at any moment.
- Shunt sizing and resolution. A shunt rated far above your typical current has less resolution at low currents, so small parasitic loads may be undercounted. Size it for expected maximum current with headroom, not wildly oversized.
- Charge efficiency. Lead-acid banks accept less energy than they receive, especially near full. Monitors use a charge-efficiency factor (often 85-95% for lead-acid, 95-99% for lithium); a wrong setting causes drift.
Interpreting Common Readings in Context
The percentage bands below are a starting point, not a universal rule. The right thresholds depend on chemistry and how much reserve you want.
- 90-100%: Fully or nearly charged. Safe to run all systems. For lead-acid, this is when the bank should sync to 100% if charging parameters are set correctly.
- 70-90%: Good capacity. Normal cruising is fine. Watch the trend rather than the number.
- 50-70%: Moderate. Plan charging soon, especially with high-load systems (air conditioning, microwave, inverter loads) in use.
For lead-acid, the voltage curve is steep at the ends and flat in the middle, so voltage alone is a poor state-of-charge indicator: a rested, fully charged flooded battery sits around 12.6-12.8 V, while 12.2 V under no load suggests a substantially discharged bank.
Setting Alerts That Actually Help
Alerts are where monitoring pays off, but poorly chosen thresholds create alarm fatigue. A practical approach:
- Low state of charge alert: Set it above the level where you want to act, not where you're already in trouble. If you want to start charging at 50%, set the alert at 55%.
- Low voltage alert: Set it below the resting voltage of a healthy bank but above where equipment misbehaves. For 12 V lead-acid, a common pattern is 11.8-12.0 V under load, adjusted for your equipment's tolerance.
- High voltage alert: Catches alternator or solar regulator faults before they overcharge the bank.
When to Distrust the Reading
Even a well-installed monitor can mislead in specific situations:
- Right after a large load or charge event. Voltage sags under load and rises during charging; state of charge may lag the real condition for a while.
- After days of partial charging. Without a full-charge resync, the estimate drifts. Plan a full charge periodically to reset it.
- When a new load was added without updating settings. A monitor does not know about a new inverter or appliance until the current flows through the shunt, but if the load bypasses the shunt, it is invisible.
The most useful habit is comparing state of charge against voltage and your own energy log. When the three agree, trust the number; when they diverge, investigate before relying on it.
Lithium Marine Battery BMS Integration
Lithium marine battery systems include a built-in battery management system (BMS) that protects individual cells from overcharge, over-discharge, and overheating.
A marine battery monitoring system lets you see these protection events in real time.
Lithium systems also benefit from temperature monitoring: performance drops in cold water and degrades faster when hot.
The integration between your external monitor and the lithium BMS is seamless, they don't conflict because they serve different purposes.
Battery Monitor Installation and Setup
Installing a marine battery monitoring system is a manageable DIY project, but the details matter: a monitor wired incorrectly, mounted in the wrong location, or left uncalibrated will give confident-looking numbers that are wrong.
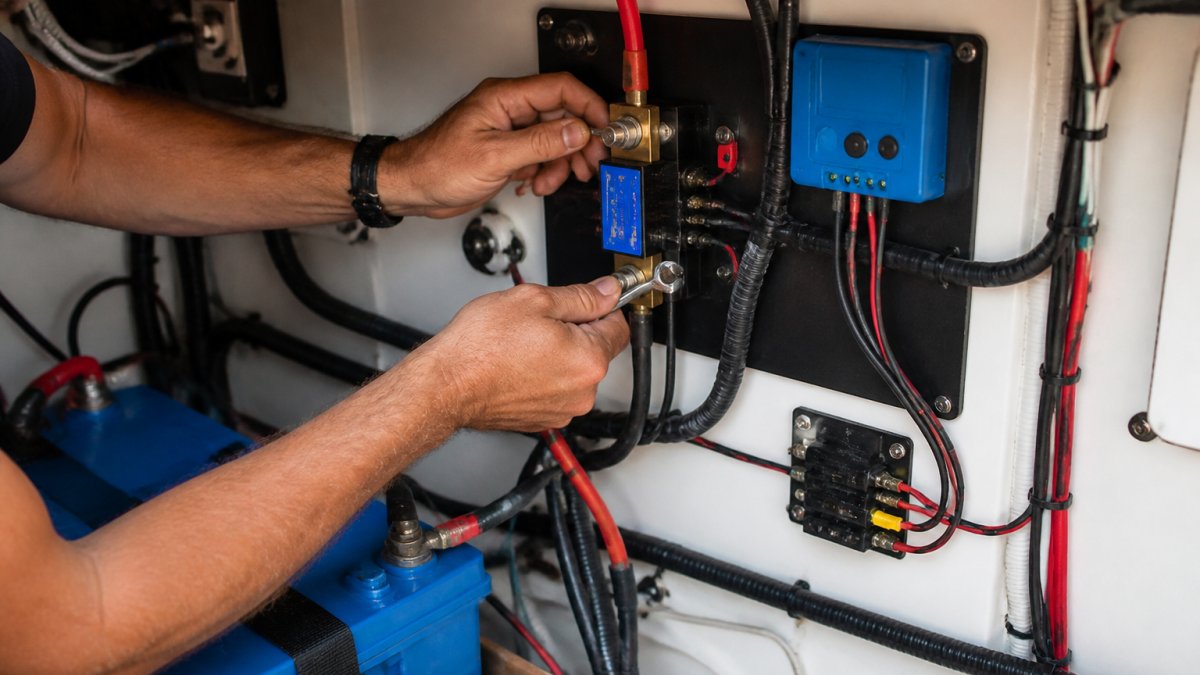
Step 1: Plan the Shunt Location
The shunt must be the only path between your battery bank's negative terminal and the boat's DC ground, so every amp flowing in or out passes through it. That requirement drives placement:
- Mount the shunt as close to the battery negative post as practical, on the load side of the main battery switch.
- Keep the shunt out of the engine room's hottest zone and away from fuel lines; most shunts are rated for a defined ambient temperature range, and accuracy drifts outside it.
- Choose a location with access for inspection. Corroded shunt terminals are a common source of bad readings.
Step 2: Wire the Shunt Correctly
Shunt wiring is where most installation errors happen. Follow the manufacturer's diagram exactly, but these principles apply to nearly every system:
- Battery side vs. load side: The shunt has a battery terminal and a load/system terminal. Reversing them makes current read backward, so the monitor shows charging when you are discharging.
- Cable gauge: Size the cable to your bank's maximum discharge current, not the monitor's rating. A 400 Ah house bank feeding a 2,000 W inverter can pull well over 150 A; use cable sized for that load and keep runs short.
- Torque and terminals: Use marine-grade tinned lugs and tighten to the shunt manufacturer's specified torque. Loose terminals create resistance, heat, and voltage-drop errors.
Step 3: Run the Monitor Cable
The display or head unit connects to the shunt through a small sense cable, often a twisted pair or shielded cable supplied with the kit.
- Route the cable away from alternator output cables, inverter feeds, and VHF coax to avoid electrical noise.
- Keep the run as short as the layout allows; long runs pick up interference and may need shielded cable.
- Secure the cable every 12-18 inches and seal every penetration with marine sealant.
Step 4: Configure Battery Capacity and Chemistry
The monitor needs to know what it's watching. Enter:
- Battery capacity in amp-hours for the bank the shunt serves. Use the manufacturer's rated capacity at the appropriate discharge rate (often the 20-hour rate for lead-acid).
- Battery chemistry (flooded lead-acid, AGM, gel, or lithium). Chemistry affects the charge-efficiency and voltage parameters the monitor uses.
- Charged voltage and tail current for lead-acid systems. These tell the monitor when to reset state of charge to 100%. A typical flooded bank might use a charged voltage around 14.4 V and a tail current of about 2-3% of capacity.
Step 5: Calibrate and Verify
Don't trust the first state-of-charge reading. Commission the monitor over a full cycle:
- Start from a known full charge. Charge the bank until your charger or solar controller reaches its absorption/float transition, then let the monitor sync to 100%.
- Apply a known load and compare. Turn on a load with a measurable draw (for example, a resistive heater or a known amp draw) and compare the monitor's current reading to a clamp meter on the same cable. They should agree within a few percent.
- Run a discharge cycle. Watch state of charge fall in step with amp-hours consumed. If the monitor drops faster or slower than expected, revisit capacity and Peukert settings.
- Recharge and confirm the reset. The monitor should return to 100% when the bank is genuinely full, not before.
Common Installation Mistakes to Avoid
- Mounting the shunt on the positive side. Shunts belong on the negative return.
- Leaving a second ground path (an engine ground or bonding wire) connected directly to the battery negative. Any current that bypasses the shunt is invisible to the monitor.
- Forgetting to move all charge sources and loads to the load side of the shunt. A single missed wire causes a persistent offset.
Once the monitor is commissioned and verified, installation is done. From then on, the value comes from interpreting readings and setting alerts that match your battery chemistry and cruising style.
Real-World Benefits: How Monitoring Extends Battery Life
Battery monitoring doesn't just show numbers, it changes how you operate your boat and directly extends battery lifespan.
Lead-acid batteries suffer permanent damage from deep discharge: each excursion below 50% permanently costs capacity.
Lithium batteries are more forgiving but still benefit from monitoring.
Real-world benefit areas:
Energy Awareness: Once you see actual power consumption, you make smarter choices. Learning that your AC unit draws 40 amps and your microwave 80 amps, and that running both drains your battery in 2 hours, changes your operating decisions.
System Reliability: You catch problems early.
Resale Value: Boats with professional battery monitoring systems command higher prices.
Battery monitoring can contribute to extended battery life.
Battery monitoring transforms how you manage power on the water.
Frequently Asked Questions
What does a marine battery monitoring system actually measure?
A marine battery monitoring system tracks voltage, current flow, and state of charge in real time. The battery monitor shunt measures current draw and supply, while sensors track battery temperature and voltage. Together, these components show you exactly how much power your batteries have available, how fast they're being used, and when they need charging. This continuous data helps you avoid over-discharging and plan power usage for extended trips.
Is a battery monitor necessary on a boat?
Yes, especially for cruising boats or live-aboard vessels. Without monitoring, you won't know your actual state of charge until the batteries fail completely, leaving you stranded. A monitor prevents costly deep discharges that damage lead-acid and lithium batteries alike, alerts you to electrical faults, and helps you manage onboard power demand. For boats running AC units, refrigeration, or navigation systems simultaneously, a monitor is essential for reliability and safety.
How does monitoring help extend battery life?
Battery monitoring prevents the two main killers of marine batteries: over-discharge and overcharging. By showing you state of charge in real time, you can avoid draining batteries below 20 percent, which causes permanent capacity loss. Alerts warn you when voltage drops dangerously low or when charging faults occur. For lithium batteries with a BMS, the monitor works with cell-level protection to prevent unsafe conditions. Monitoring can help extend battery life.
What's the difference between a battery monitor and a battery management system?
A battery monitor displays data and alerts you to problems; it does not control charging or discharge. A battery management system (BMS) actively protects batteries by cutting off charging or discharging when unsafe conditions occur. Lithium marine battery systems include a built-in BMS for safety. Many boat owners use both: a monitor for visibility and alerts, plus a BMS in lithium systems for automatic protection. Lead-acid systems benefit from monitoring alone, though a BMS adds an extra safety layer.